In this short exercise you'll deploy Kafka, PostgreSQL, and the Microservices of the reactive example via a script and test the example application.
Step 1: Deploy the example application
Invoke the following command:
bash ~/cloud-native-starter/reactive/os4-scripts/deploy-example.sh
The deployment takes approximately 10 minutes.
The script console output shows links to the Microservices and the Web-App at the end of the execution.
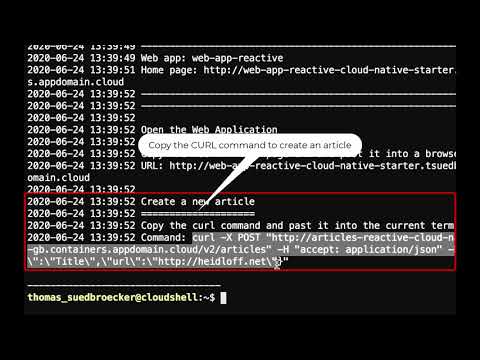
The following 35 sec YouTube video shows a example execution of the script and the test of the application.

Step 2: Launch the web application
To launch the web application get the URL from the last output and open the application in a browser.
Step 3: Copy the curl command
Copy the curl command to create a new article and insert it into your current terminal session.
Step 4: Test the example application
Open the web application in a browser. Then invoke the curl post command. The web application should show the new entry.
Step 5 (optional): Verify the deployed PostgreSQL
You can check the status via the OpenShift web console. On the 'Pods' page select the 'postgres' project.
Step 6 (optional): Verify the deployed Kafka
You can check the status via the OpenShift web console. On the 'Pods' page select the 'kafka' project.
Step 7 (optional): Verify the deployed Services and Web Application
Make sure all four pods in the 'cloud-native-starter' project are running.
The previous steps have create build configs, builds and image streams.


